Monthly Archives: March 2010

DECADENCE::: Caramel Blondies

The title perfectly describes this recipe: decadent. Though it is definitely one of my least healthy entries to date, it sure is delicious! Hidden between 2 layers of cookie dough is gooey caramel and chocolate chips.  If you can handle the traditional from-scratch chocolate chip cookie, give these a whirl.

Below is 1 1/2 times the normal chocolate chip cookie recipe. I didn’t need quite this much dough, but just making the usual amount was not enough. While they still tasted good, they were not pretty.

What you will need:

  • 8×8 or 9×9 Pan
  • Mixer
  • Spatula

Ingredients:

  • 3 1/3 Cups Flour
  • 1 1/2 Tsp Baking Soda
  • 1 1/2 Tsp Salt
  • 1 1/2 Cups Butter, Softened
  • 1 Cup, 2 Tbsp Sugar
  • 1 Cup, 2 Tbsp Brown Sugar, packed
  • 1 1/2 Tsp Vanilla
  • 3 Large Eggs
  • 1/2 Cup Chocolate Chips
  • 1 Jar Caramel Topping

Instructions:

Preheat the oven to 375°F and grease the pan.

A view of the necessary ingredients.

In the mixer, beat the butter, sugar, brown sugar and vanilla until creamy.

Add the eggs, one at a time, beating after each.

Add the baking soda and salt and beat, only for about 20 seconds, so that it is evenly dispersed.

Gradually add the flour.

In the pan, make an even layer, about 3/4 inch thick.

  • Tip: My mother taught me that if you wet your finger tips, you can use them to pat the dough into the pan without it sticking to your fingers.

Spread a thin layer across the pan and bake, but not completely!

Bake for 8-10 minutes.

Remove and allow to cool for about 10 minutes.

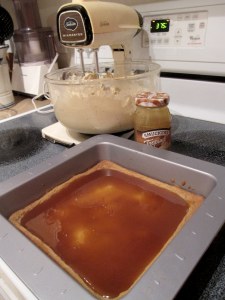
Pour the caramel on top of the brownies. Use a spatula to spread it around if it does not evenly disperse.

Smooth the caramel to make an even layer.

Cover the caramel with a layer of chocolate chips.

Adding the chips gives this recipe a "gooey-chocolate-chip-cookie" feel.

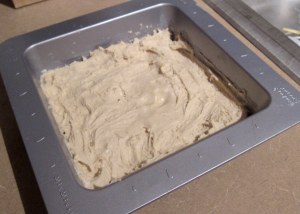
Now cover with the remaining cookie dough. I did not need to use all of the dough, and ended up with about 3/4 cup of dough leftover.

  • Tip: Place large dollops over the entire pan. That way, you will not have to do as much spreading.

Hide the middle layer with another layer of dough.

Bake for 20-30 minutes. The center should not jiggle when the top is touched or the pan is moved.

No one will know the surprise which awaits them!

1 Comment

Filed under Recipes

Simple Side::White Wine Mushrooms

I had three tubs of mushrooms, so obviously I had no choice but to cook them. I was looking for a simple recipe that was quick and easy.  This did the trick. The strongest flavor is the mushrooms.  The white wine is a nice complement; it goes well with the mushrooms, but is nice and subtle.

If all you have in the house is some leftover red, don’t let it go to waste! This recipe would work with white or red, and the addition of freshly chopped herbs (parsley, basil, etc.) would enhance it further.

What you need:

  • Knife
  • Cutting Board
  • Sauté Pan
  • Spatula or Spoon

Ingredients:

  • 16 oz Mushrooms
  • 1/2 Cup White Wine
  • 2 Tbsp Extra Virgin Olive Oil
  • 3-4 Cloves Garlic
  • 1 Tsp Dried Basil
  • Freshly Ground Salt & Pepper
  • If you have fresh herbs, I would definitely recommend chopping them for use in this recipe and omitting the dried basil. I didn’t have any, so dried was as good as it was going to get.

Instructions:

Clean and slice the mushrooms.

I sliced the mushrooms while watching Food Network. How fitting.

Mince the garlic

In the pan, combine the olive oil, garlic, and mushrooms over medium heat. Stir the mushrooms to distribute the olive oil. Cook for 1-3 minutes.

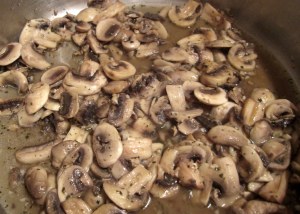
Add the wine.  Let simmer a few minutes, until the mushrooms are soft.

White, red, pink, dry, sweet....what's your flavor?

Add the herbs. Salt and pepper to taste, I was pretty generous with both.

Let the mushrooms simmer in the wine, and season to taste. Simply add salt and pepper, or embellish with fresh or dried herbs.

Leave a comment

Filed under Recipes

Meet the Meatloaf, You’re Newest Friend::

I must admit, it was difficult to get back into the swing of blogging after my week off for spring break (potentially my last…don’t want to talk about that).  This meatloaf has got me excited to cook, yet again!  My first stab at meatloaf involved an entire bottle of barbecue sauce, lots of ketchup, and generous amounts of brown sugar.  Needless to say, it didn’t make it to the blog.

This recipe however came out great.  Inspiration for this recipe came from a recipe I found on Epicurious for turkey meatloaf.  However, it was not until I was grocery shopping that I realized that ground turkey had nearly as much fat as ground beef, so I decided to go for the real deal.  (There is ground turkey breast which is nearly fat free, but it is much more expensive.  I can’t vouch for its flavor, though I would bet that it’s not nearly as tasty as beef.)  Once I realized I wasn’t actually making a turkey meatloaf, I really ventured from the original recipe, adding additional spice and sweetness.  The final product was a recipe which I will definitely repeat.

What you will need:

  • Cutting Board
  • Large Knife
  • Peeler
  • Bowl
  • Measuring Cup
  • Rimmed Baking Sheet

Ingredients:

  • 1 Cup Yellow Onion, Finely Chopped
  • 1 Cup Zucchini, Coarsely Grated
  • 3/4 Cup Fresh Parsley, Finely Chopped
  • 3/4 Cups Italian Seasoned Bread Crumbs
  • 2 Eggs
  • 1/2 Tsp Garlic Powder
  • 1/2 Cup Sweet Chili Sauce
  • 1 1/5 lbs Ground Beef
  • 1/2 Cup Peach Preserves
  • 1/4 Cup Dijon Mustard
  • 1/4 Cup Brown Sugar

Instructions:

Preheat the oven to 350°F and grease the baking sheet.

Use the peeler long ways on the zucchini to make thin strips.  Cut the strips to be short pieces.  Place one cup in the bowl and discard any extra.

The peeler/knife method worked well, but a larger grater would also do the trick.

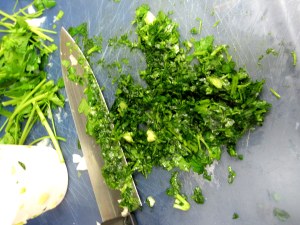
Chop the onion and parsley finely and add to the bowl.

parsley

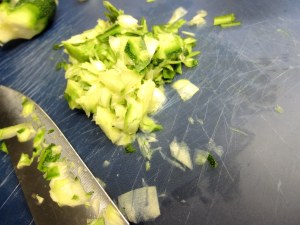
Chop the parsley finely. As you can see I did not use the stems.

Add the ground beef, bread crumbs, eggs, chili sauce, and garlic to the bowl.

Add the ingredients to a large mixing bowl as you prepare each one.

Wash your hands–they are your mixing tool so do it thoroughly!

Mix the ingredients with your hands, making sure to evenly distribute the zucchini, onion, and other ingredients.

Iron Chef?

On the pan, form a loaf 2-3 inches high, 8-10 inches long, and about 4 inches wide.

Bake for 20 minutes.

My lovely assistant (my hands were dirty)

While baking, make the topping.  Combine the mustard, preserves, and brown sugar in a bowl.

The topping is very simple, yet stands out in this recipe.

After 20 minutes, remove the meatloaf from the oven and cover with the topping (make sure you get the sides too).

Return to the oven for 15 minutes.

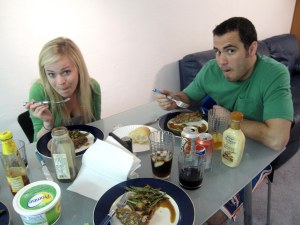
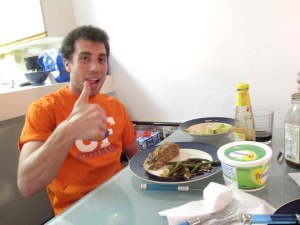
Thanks Hannah & Grant for being my guinea pigs!

You too Chad! Glad you're back!

2 Comments

Filed under Recipes

Cheesey Stuffed Mushrooms::

Hors d’œuvres anyone? Hosting a party anytime soon?  These mushrooms are the perfect finger foods to serve as appetizers at a dinner or cocktail party, or as a light dinner with a big leafy salad.  Make a whole bunch of these and freeze them for your next occasion, or whip them up for an impressive looking, yet easy snack.

I got the idea for this recipe from my Cooking Light Cookbook, but modified it substantially.  If you would like to see the original recipe, search “Cannellini-Stuffed Portobello Mushrooms”.  Their recipe includes tomato sauce and less garlic.  I have never tried it, so I cannot attest to its good flavor.  I can tell you that Grant and I enjoyed this version while relaxing at the beach for a few nights!

What you will need:

  • 2 Medium Sized Bowls
  • Sink
  • Spoon
  • Baking Sheet

Ingredients:

  • 10 Medium Sized White Mushrooms
  • 2 Tbsp Extra Virgin Olive Oil
  • 3/4 Cup Ricotta Cheese
  • 2 1/2 Tsp Garlic Salt
  • 1 Tsp Crushed Dried Rosemary
  • Black Pepper
  • 1/2 Cup Cannellini Beans, Drained
  • 1/2 Cup Shredded Mozzarella Cheese
  • Cooking Spray

Instructions:

Set the oven to broil.

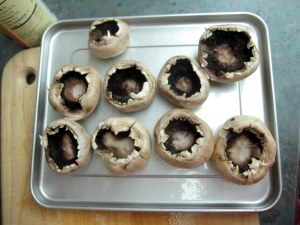
Clean the mushrooms.  Use the spoon or your fingers to remove the stems and gills.

Place the mushrooms smooth side up on the sprayed baking sheet.

Mushrooms

Prepare the mushrooms by removing the insides and quickly broiling them on each side.

Broil for 2 minutes.  Remove the baking sheet, flip the mushrooms, and broil for 2 minutes on the other side. Remove for filling.

While cooking the mushrooms, make the filling.

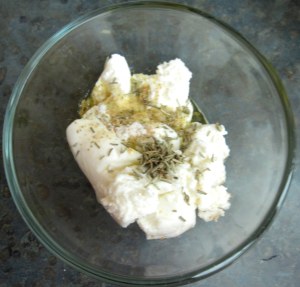
In a bowl, combine the ricotta cheese, 1 Tbsp olive oil, 1 tsp garlic salt, and rosemary.  Season with pepper to taste and add more garlic salt if desired (I did).

  • If you have other spices in the house, experiment with them.  Try adding some dried oregano, or if you like spice add some red pepper flakes.
ricotta

The filling for these mushrooms only requires the mixing of a few raw ingredients!

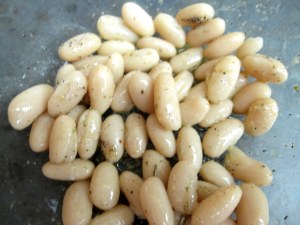
In the other bowl, combine the cannelini beans with 1 Tbsp olive oil and 1/2 tsp garlic salt.  Season with pepper to taste.

cannellini beans

Drain the cannellini beans, add some olive oil, and season with garlic salt and pepper. Measuring not required in this recipe--taste as you go!

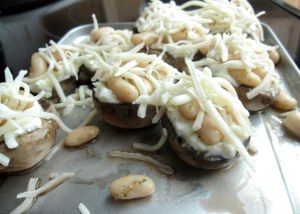
Fill each mushroom with the ricotta mixture.

Top each with canellinni beans.

Sprinkle with mozzarella cheese and broil till melted.

Sprinkle the mushrooms with shredded mozzarella.

  • If you are freezing these to serve at a later time, I would recommend stopping at the ricotta step, baking for 1-2 minutes, then freezing in a ziplock bag.

Broil 3 minutes or until cheese is melted.

Stuffed Mushrooms::inspired by Cooking Light, though much different from the original recipe.

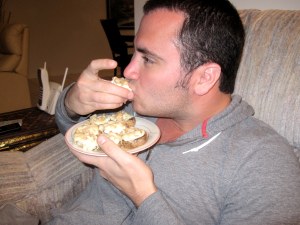
Grant digging in!

Can you tell I was at the beach?

3 Comments

Filed under Recipes

Colorful Coleslaw:::

This coleslaw is as tasty as it is colorful.  Full of atypical slaw ingredients, fruit, veggies, and a soy vinaigrette flavor this healthy snack.  Tasty coleslaws are usually dressed with copious amounts of mayonnaise; this one cuts the fat and still leaves you satisfied.  The ingredients are chopped and added to a bed of cabbage, then topped with a homemade dressing.  Top it with grilled chicken or salmon, or serve it as a side dish.  Best of all, this recipe is great in a hurry!  If you purchase the ingredients precut, there is virtually no prep time.

What you will need:

  • Cutting Board
  • Knife
  • Large Bowl or Serving Dish (with lid)
  • Small Bowl
  • Fork or Whisk

Ingredients:

  • 1/2 Bag Coleslaw (Cabbage)
  • 3/4 Cup Matchstick Carrots
  • 3/4 Cup Diced Red, Orange, or Yellow Bell Peppers: I used red and orange. I would recommend staying away from green peppers in this recipe.
  • 1/4 Cup Sweet Onion, Diced
  • 1/2 Cup Mandarin Orange Segments: Cut the segments into smaller pieces
  • 1/2 Mango, Finely Diced
  • 1/2 Cup Pineapple Chunks
  • 3 TBSP Light or Low Fat Mayonnaise
  • 3 TBSP Low Sodium Soy Sauce
  • 1 TBSP Balsamic Vinegar
  • 2 TBSP White Sugar

Instructions:

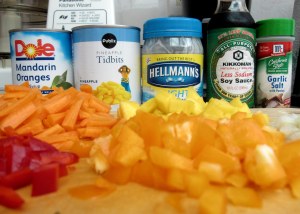
On the cutting board, dice each of the fruits and vegetables (except the carrots).

Slaw ingredients

The colorful ingredients in this recipe appeal to the eye and add great flavor.

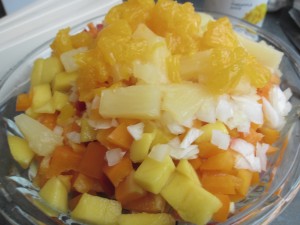
Add to the dish or bowl over the bagged cabbage.

Slaw before Dressing

Add the chopped ingredients to the prebagged cabbage.

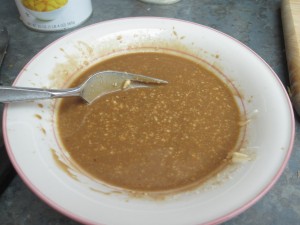
In the smaller bowl, combine the mayonnaise, soy sauce, balsamic vinegar, and sugar. Beat with a fork or whisk until the ingredients are thoroughly combined.  When thoroughly mixed, the mayo will thicken and lighten the color of the dressing, but will no longer be distinctly visible.

slaw dressing

Continue whisking until the dressing is fully incorporated and no one ingredient stands out.

Pour over the slaw ingredients.

Cover the dish and shake vigorously.  Stir to ensure that each ingredient is evenly dispersed.

Enjoy this—guilt-free!

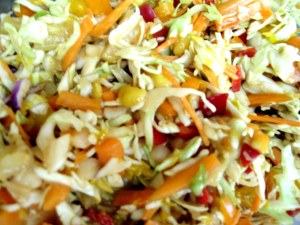
Colorful Coleslaw

This coleslaw will even appeal even to wholehearted carnivores-- I know from experience!

Leave a comment

Filed under Recipes

Spin Off: Liven Up Your Basic Alfredo!

This recipe is a spin off of the normal Alfredo recipe.  You may think a homemade cream sauce sounds difficult to make, but it’s really pretty simple and relatively hard to mess up.  Think about it, what could be bad about cheese & cream.  I found this recipe to be comparably rich to anything you would find at your neighborhood Italian spot, but it was made with skim milk and fat free half and half, instead of heavy cream and lots of butter.  The recipe starts out by making a roux, cooking in some veggies, then adding in the creamy, cheesy goodness.  A roux is a mixture of flour and fat, which is used to thicken sauces, soups, and stew.  Don’t let the fancy word scare you, making a roux takes little instruction and will help you in many of your future cooking endeavors.

What you will need:

  • Small & Large Knife
  • Large Saucepan
  • Whisk
  • Spoon
  • Cutting Board

Ingredients:

  • Medium Sized Yellow Onion
  • 4 Large Mushrooms
  • 3/4 Cups Peas
  • 1/2 Tbsp Garlic Salt OR 1 Tbsp Fresh Minced Garlic: I was out of garlic so used salt instead, though I am certain that fresh garlic would be better.
  • 1/2 Tbsp Dried Parsley
  • 1 Cup Skim Milk
  • 1/2 Cup Fat Free Half & Half
  • 2 Ounces Reduced Fat Cream Cheese
  • 3/4 Cup Grated Parmesan Cheese
  • 2 Tbsp Butter, Unsalted
  • 2 Tbsp Flour
  • Optional: 2 strips turkey bacon. (I used turkey bacon because I do not cook pork, but thought it would add a nice salty, smokiness to the sauce.  Unfortunately, I didn’t think it added anything special. For those unopposed to using real pork, try it out!)

Instructions:

Place the butter in the pan over medium heat to melt.

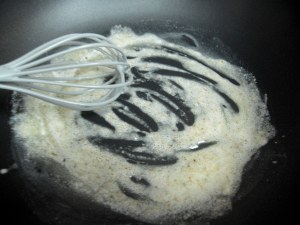
Roux

Before adding in the flour, allow the garlic to cook for a minute in the melted butter.

In the meantime, wash and slice the mushrooms and slice the onion.

Add the garlic.  After letting the garlic cook for a minute, whisk in the flour.  The butter and flour will clump together, but will loosen when the other liquids are added.

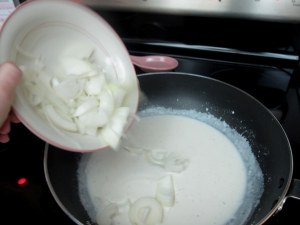
Add 3/4 of the milk and all of the half and half while whisking.  Continue to whisk so that the roux is dispersed and the sauce begins to thicken (a few minutes). Add the onions and set on very low heat, stirring occasionally.

Simmering Cream Sauce

Add the half & half and milk to the roux while whisking, then allow the onions to simmer in it.

  • I served this with salmon and angel hair, so while the onions were cooking, I started on those projects.

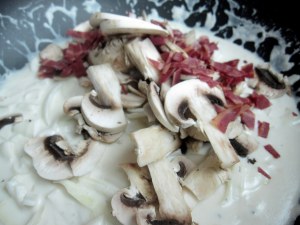
When the onion has softened, add the mushrooms and 1/2 Tbsp parsley. Stir.

Cream Sauce

Add the mushrooms, and turkey bacon if you choose, and let cook for a minute before incorporating the cheeses.

  • If the sauce seems very thick, add the rest of the milk, then more half and half if you feel necessary.

Add the cream cheese and parmesan cheese.  Mix until completely melted into the sauce.

Add the peas.  Mix.

  • I added turkey bacon to the sauce because I thought it would add to the flavor, though I do not cook pork; however, I think the sauce would have been equally as good having foregone this ingredient. If you do decide to use it, add it with the mushrooms.

Serve immediately, while HOT!

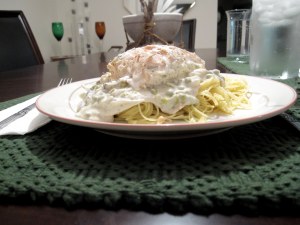
Cream sauce

I served the sauce with salmon over angel hair. I think it would also have been good with chicken or all on its own!

Leave a comment

Filed under Recipes

Angel Hair with Vegetables, Goat Cheese & Basil

Being that I will be leaving my humble Gainesville abode for spring break, the late night snack options in my apartment are pretty limited.  With that being said, I whipped a pretty decent dish for a very late dinner during the series finale of Nip/Tuck.

What you will need:

  • Pot
  • Large Saucepan
  • Large Spoon
  • Peeler
  • Cutting Board

Ingredients:

  • Buitoni Angel Hair Pasta: Buitoni fresh pastas can be stored in the freezer, so I happened to have some handy.  While I’ve raved about the superior taste of fresh pasta, it is not necessary. Substitute angel hair, linguini, shells, etc.
  • 4 Large Carrots
  • Tub of Mushrooms
  • 2 Tbsp Fresh Basil, Chopped
  • 3 1/2 Tbsp Extra Virgin Olive Oil
  • 2 Tbsp Promise Fat Free Butter
  • 2 Large Cloves Garlic, Minced
  • Fresh Ground Salt and Pepper
  • Goat Cheese: Goat cheese is usually sold in a packaged, plastic wrapped roll.

Instructions:

Peel the carrots. Chop them up. Place them in the saucepan over medium to high heat with 3 tbsp olive oil. Stir every couple minutes.

The carrots add a little sweetness and crunch to this dish.

Wash the mushrooms. Slice them.

Add water and 1/2 tbsp olive oil to the pot and bring to a vigorous boil.

Add the mushrooms, garlic, basil, and Promise to the pan. Continue to mix every couple of minutes.  Add salt and pepper to taste, I was generous. The mixture is done when the carrots become soft (though, they should still retain some crunch).

Sautée until the carrots begin to soften.

When the water is boiling, add the pasta.  Cook and drain.

Place a mound of pasta on the plate. Top with the carrots and mushrooms.

Use a fork or knife to make the goat cheese “sprinkle” over top.

Dinner is served!

Looks pretty gourmet for such a simple dish!

Leave a comment

Filed under Recipes

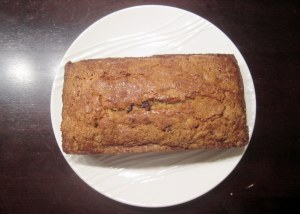
BA-NANAS:: Chocolate Chip Banana Bread

As long as you have the ingredients handy, banana bread is super easy whip up.  Not to mention, it’s versatile.  It tastes great with walnuts, cranberries, chocolate chips, pecans, sugary topping, sour cream, buttermilk, cinnamon…need I go on?  Eat it morning, noon, or night.

My biggest suggestion is to use ripe bananas, as they are more flavorful.  I used to get made fun of for buying one banana at a time.  Every time I bought more, they would sit on my counter until their increasingly freckly appearance became less than appetizing.  If this happens to you, next time, instead of pitching them, peel and freeze them. Additionally, stores will frequently sell large amounts of over-ripe bananas on quick sale.  On numerous occasions and at different Gainesville grocers (Ward’s & Albertsons, not Publix), I have found over 10 bananas for a buck!  I’ll buy them, leave one or two out for immediate ingestion, then peel and freeze the rest.  The bananas stay in the freezer, easily for months. Pull a couple out of the freezer for milkshakes, smoothies, or banana bread!

What you will need:

  • Medium Sized Mixing Bowl
  • Spatula or Mixing Spoon
  • 9 x 5 Inch Loaf Pan
  • Plate
  • Fork

Ingedients:

  • 1/2 Cup Butter, Melted
  • 1 1/5 Cups Flour
  • 1 Cup Sugar
  • 2 Eggs
  • 1/4 Cup Vegetable Oil
  • 1/4 Cup Sour Cream
  • 2  – 3 Bananas:  If they’re small use 3.
  • 1/2 Cup Chocolate Chips
  • 1/2 Tsp Salt
  • 1 Tsp Vanilla Extract
  • 1 Tsp Baking Soda
  • Coarsely Granulated Sugar: This is the “Raw Sugar” sometimes served at restaurants to add to coffee and tea.  I like to sprinkle this on top.  It looks pretty and adds a sweet touch to the “crust”.

Instructions:

Grease the pan with butter and preheat the oven to 350° Fahrenheit.

In the bowl, combine the melted butter and sugar.

Mix in the eggs and vanilla.

Mix in the baking soda, then salt, then flour.

Mix in the sour cream and oil.

The batter should be smooth before adding the bananas and chips.

On a plate or cutting board, mash the bananas with a fork.

Mash the bananas, but don't take it to the nearly-puréed level.

Mix in the bananas and chocolate chips.

Spread evenly in the pan, sprinkle with the granulated sugar if desired, and bake for 40 – 50 minutes, or until a toothpick inserted in the center comes out clean.

Spread evenly in the pan, then sprinkle the coarse sugar on top.

Remove from the pan 5 to 10 minutes after baking.  Allow to cool on a plate or wire rack.

Make sure that you cover the loaf once it has been cut.

3 Comments

Filed under Recipes

Cornflake Crusted Ranch Chicken

Anyone who knows me well knows that chicken usually isn’t my entrée of choice. Aside from Chicken Marsala, the chicken I like is usually greasy, fried, or both.  So, when I came across this recipe, it seemed like it may be a healthier version of the crispy comfort food we all love.  While it didn’t really remind me of fried chicken, it was tasty none-the-less.

I added more spice, seasoning, and a ranch twist to the original recipe.  The final product was well received by my guests!

What you will need:

  • Medium Sized Bowl
  • Large Ziploc Bag
  • Large Baking Sheet

Ingredients:

  • 16 Ounce Container of Regular or Light Sour Cream: Don’t use fat free!
  • 1/2 Tablespoon Crushed Red Pepper: I used about 1/4 tablespoon and think it could have used a bit more; however, this depends on personal preference.
  • 1 Tablespoon Garlic Powder or Italian Seasoning: I used garlic, but Italian seasoning would serve the same purpose.
  • 3 Cups Crushed Cornflakes
  • 1 Packet Hidden Valley Ranch Dip Mix
  • 3 Chicken Breasts, Halved, Trimmed, & Pounded: Halve the chicken breasts, trim the fat, and pound with a meat pounder or other heavy, nonabrasive object. Pounding the chicken makes the pieces tender and of even thickness.
  • 1 Tbsp Butter: Used to grease the baking sheet.

Instructions:

Wash your hands well, as you will be using them to crush the cornflakes.

Place the cornflakes in the bowl and crush throughly.  Add the crushed red pepper and garlic powder or italian seasoning, and mix.

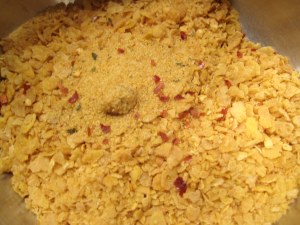
Seasoned Cornflakes

Seasoning the corn flakes with plenty of garlic powder will add a lot of flavor to this dish. I recommend being generous with the pepper if you & your guests are fans of spice! (I crushed the flakes even smaller than what is shown in this picture.)

Directly in the 16 ounce container of sour cream, mix in about 3/4 of the ranch dip packet.

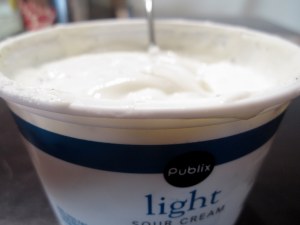
Sour Cream

Avoid dirtying another dish by dipping the chicken directly into the sour cream container.

Dredge each chicken breast in the sour cream and place it inside the ziploc bag. When all the chicken breasts are coated in the sour cream, empty the remaining contents into the bag.  Store in the refrigerator until 40 minutes before you plan to serve the dish.

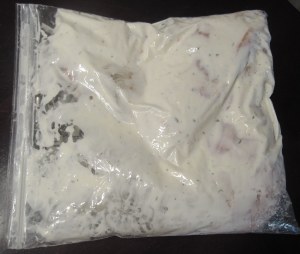
marinating chicken

Allow the chicken to marinate, if possible, to enhance absorption of flavor and moisture of the chicken.

Preheat the oven to 350 °Fahrenheit. Grease the baking sheet.

Remove the chicken from the refrigerator. One at a time, remove chicken pieces from the bag and place in the bowl of crumbs. Flip to cover both sides.  Make sure each breast is covered with a generous amount of sour cream before coating in the crumbs. Place the crumb-coated chicken breasts on the baking sheet.

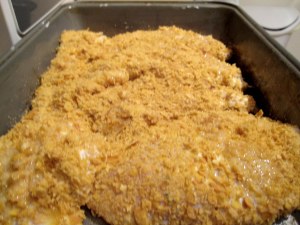
Raw Cornflake chicken

The chicken, prior to baking.

Bake for 30 minutes. Remove from the oven & serve.

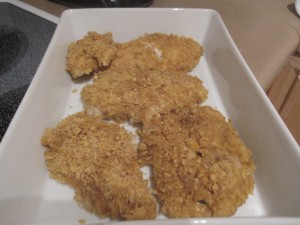
Cooked Cornflake Chicken

The cornflakes should form a crust around the chicken.

I served with a little bit of ranch dip and grated colby cheese, not necessary, but a nice addition.

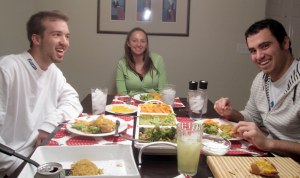
Cornflake Dinner Guests

Thanks to Michelle & Evan (you too, Grant) for coming to dinner and being the guinea pigs of new recipes!

Leave a comment

Filed under Recipes